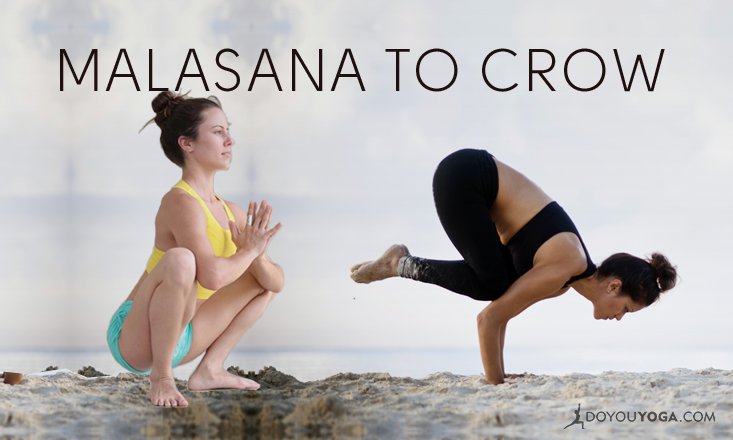
Crow pose will always hold a special place in my heart because it was the first (personally) challenging pose that I held. I owe a debt of gratitude to one of my first teachers, who gave me the simple Crow cue that helped me fly.
I should note that there are other poses you can use to move into Crow pose, but here, I’ll share with you some tips for a great Malasana to Crow transition that includes this transformational cue.
1. Prepare Your Nest
If you are new to Crow, sometimes the fear of a crash landing can be a challenge. If you don’t yet have a large bolster (my favorite prop) this is yet another great reason to invest in one. Of course, you can also use pillows, a rolled up towel, or blankets from around your house.
Place the bolster or pillow in front of you before you enter Malasana. Should you fall forward, you’ll have a soft landing. As your Crow gains confidence, you can forego the bolster.
2. Get Centered in Malasana (Low Squat)
Begin standing with your feet a bit wider than hip width apart. Turn heels in and toes out. Draw your hands together in prayer at heart center. Press your palms together so that your elbows are about even with your hands. Inhale deeply.
On your exhale breath, allow your bottom to sink slowly toward the ground. Remember, this isn’t the dance floor—we’re not dropping it like it’s hot. Move slowly and with intention, mindful that the soles of the feet stay grounded and there’s no stress on the ankles. Bring your elbows to the inside of your knees and feel connected in this space as your elbows press outward.
Eye gaze is forward. Breathe. Notice your spine and honor it’s natural curves in Malasana. Try to avoid hunching your shoulders and rounding the back. If your back rounds, consider using the block option below.
Options: Bring a block beneath the bottom (low, medium, or high setting) if your hips are looking for a bit more support. You might also wish to place a folded blanket under your heels.
3. Knees High as You Get Ready to Fly!
It’s time to fly. Inhale and place your hands on the mat about shoulder width apart with fingers spread. Press evenly across your palms as you shift your weight forward. You’ll feel your heels lifting off of the ground as you come onto your toes.
Now, here’s the cue that my teacher offered me one night in class that made all the difference: get your knees high. While still on your toes, lift your knees almost as high as your armpits and press into that space on both sides. There’s your sweet spot.
When I see students struggling with Crow, it’s often because their elbows are much closer to their knees. Get those knees up and then take that final tilt, lifting toes off the ground. You’re now completely balanced on your hands in Crow.
4. Enjoy the Ride
Activate the pelvic floor by drawing in your belly just beneath your navel. An engaged core is critical for all balance poses. Your eye gaze should be down and slightly forward without any strain on the back of your neck. Breathe.
Remember that while you should be aware of the different elements of the pose (knees pressed into upper arms, core active, fingers spread), you can also take this opportunity to feel the pose in its entirety.
Hold here for 3-5 breaths. When you’re ready to return to Earth, gently rock back onto your feet, either returning to Malasana or proceeding into your next pose.
The great gift of these two challenging poses is that they both require our full attention. As we bring our focus to our bodies and breath, the chatter of the mind (citta) will begin to quiet.
Do you love the Malasana to Crow transition or do you have another favorite way to enter Crow pose?
Image Credit: Andrea Taylor
