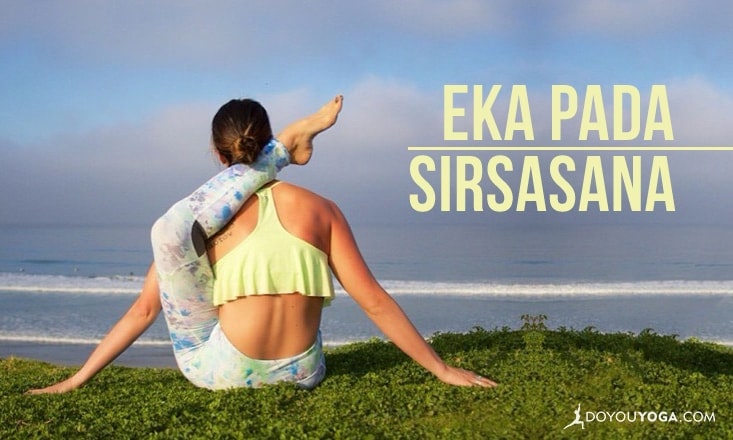
Also known as Foot-Behind-the-Head Pose, Eka Pada Sirsasana is an advanced yoga pose that requires a certain combination of flexibility and strength. Just one glance at the pose and it’s clear that it’s no easy feat, physically.
More than that, Eka Pada Sirsasana also demands a great deal of mental persistence and patience for the oftentimes arduous journey to getting your leg behind your head.
Before attempting, make sure that you’ve warmed up the body—especially the hamstrings, hips, and core. Also keep in mind the advanced nature of this asana, remembering along to way to listen to your body and to not force the pose.
Eka Pada Sirsasana is typically practiced in the Ashtanga manner with a regimented series of poses that lead a yogi to the pose. However, Foot-Behind-the-Head-Pose can also be practiced outside of a full Ashtanga practice— one method of entering the pose is broken down below.
Benefits
Eka Pada Sirsasana stretches the hamstrings, glutes, psoas, and hip. Although it seems like having the foot behind the head mainly challenges flexibility, the pose actually demands much strength to hold the tucked foot/calf in place behind the neck.
Specifically, the posture can tone the core region as the torso needs to be held upright to prevent the chest from collapsing forward due to the natural pull of the raised leg. As a result of the push and pull of the leg and neck, the back can also experience a significant stretch.
Step-by-Step Instructions
- Sit upright with both legs extended straight in front of you.
- Bend the right knee, bringing the sole of the right foot to the ground in line with the left knee.
- Then lower the right knee down to ground to the right, opening the hip (it should look like Janu Sirsasana prep or a seated Tree Pose). This external rotation of the hip is key for setting up the alignment of the final pose.
- Next, grab the ankle of the right foot and hug the right shin in towards the chest. The knee and ankle should be in line with one another.
- With the left hand grasping the right ankle, start to draw the right knee slightly out to the right-side to provide room for the right shoulder to eventually fit underneath.
- Ensure that both sit bones are firmly planted and the hips are even before beginning to work the right arm to the inside of the right leg. The right shoulder then moves forward and the right leg moves farther back on top of the shoulder.
- Finally, tuck the foot behind the head. Use the left hand (still gripping the ankle) to work the right calf down the upper back (to relieve pressure on the neck).
- Find softness in the hips and release the grip bringing the hands to touch at heart center.
- Hold for 5 breaths. Then either fold forward for a further stretch, or tuck the chin and use the same hand grip placement to release out of the pose.
Eka Pada Sirsasana Variations
Holding some of the preparatory poses for Eka Pada Sirsasana (see Steps 4, 5, 6) are wonderful places to start building flexibility for the posture. Hugging the shin towards the chest (Step 4) is basically the same concept of Foot-Behind-the-Head-Pose and will gradually open the hips and hamstrings.
Steps 5 and 6 teach the mechanics for getting your leg over your shoulder like a backpack. In addition, try practicing externally active hip exercises such as fire log, half Happy Baby, and figure 4 pose.
Contraindications
A pose as advanced as this one should be practiced with diligence and care. Eka Pada Sirsasana is an extreme hip opener, and compromising the proper alignment of the pose could potentially cause problematic strain. Proceed with caution if you suffer from knee, hip, neck or back problems.
Due to the intensity, it is recommended to spend some time in counterposes after practicing Eka Pada Sirsasana. Backbending poses such as Wheel, Bridge, or Camel (spinal extension) will counter the flexion aspect of Eka Pada Sirsasana.
Simple supine spinal twists are also very restorative and rejuvenating after spending time with your feet behind your head. Happy practicing!
Image credit: AlissaYoga
