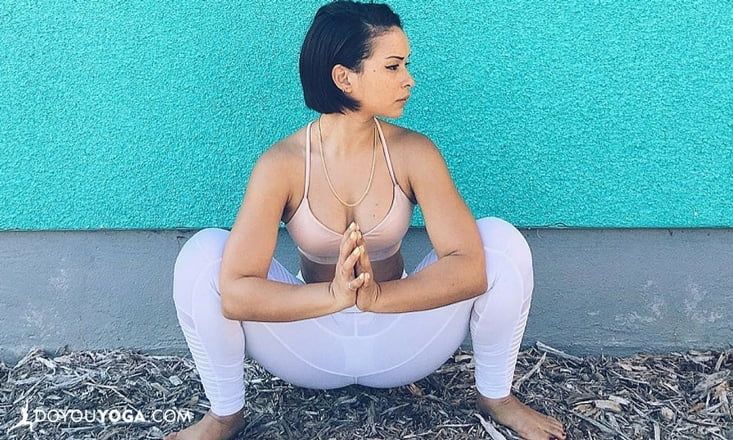
Most people think of squats in the context of workout or gym exercises, but it’s also a beneficial yoga posture that you can add into your daily routine and yoga practice. Also known as Garland pose, and Malasana in Sanskrit, the yogi squat is a natural part of human locomotion that has been largely replaced by sitting.
We sit at work, as we watch TV, when we eat, and even when we use the toilet. These habits ultimately restrict our natural range of motion, and can lead to weakened muscles in the legs and low back.
Benefits of Yogi Squats
Malasana stretches the ankles, hips, and low back while toning the core and the lower body. It is also great for digestion because it stimulates the digestive system and apana, the downward energy in the body responsible for eliminating waste. Mentally, holding the pose promotes a calm state of mind and focus.
Some yogis can squat without much preparation, while others need to acclimate their bodies to the pose. The key to unlocking your squat is to practice it every day, little by little. The more you practice, the more you will be able to explore and maintain the pose.
If you find yourself frustrated every time you try the yogi squat, don’t be discouraged. A consistent yoga practice can get you closer to that elusive yoga squat, be patient!
The following quick techniques can help you build strength and improve your yogi squat. Explore what works for you, your body and your mind.
1. Boost with a Blanket
If you are unable to bring your heels to the floor, grab a blanket and fold or roll it. Place the blanket under your heels, allowing it boost the floor and provide support. Once your heels are slightly elevated, it will feel easier to place your weight in the heels. Notice where your weight is most balanced, and what it feels like to send it down and back into the heels.
2. Lift the Toes
To test your balance and stability, try lifting all ten of your toes away from the mat. This move will push your weight into your heels, and allow you to feel the downward motion in the body. It is also a great way to strengthen the feet and shift your focus to balancing the body.
3. Change the Arms
Traditionally, in a yogi squat, the arms are placed on the inside of the legs, elbows to thighs. Change the arm position by bringing the arms to the tops of the legs and reaching outward. Check your alignment, and reach down to the ground while pressing the heels down toward the mat.
4. Use a Wall
A wall can be a great support to your squat. Find a wall and begin to sit back, like you are in a chair. Engage the core and stand tall, feeling the activation in the legs. Hold the pose for 1-3 minutes to build strength in the low body.
5. Add a Twist
Bring the feet wider and squat down, bring the arms inside of the legs. Reach the right hand out, pressing fingertips into the ground. Lift the left arm up, and focus on opening the chest. Take five breaths in the pose, and switch sides.
6. Sit on a Block
This technique is particularly good if you need to be mindful of your knees. In this variation, you still get the benefits of creating space in the lower back and lift in the chest, while having extra support from a block. Simply place the block at the height of your choice to add support.
7. Practice it Every Day!
When it comes to improving your yogi squat, the key is to try it consistently. You can insert the pose into your yoga practice, or try to hold it a few minutes every day. Replace a time when you sit with a squat instead, such as watching TV, surfing the internet, or chatting on the phone.
Once you practice the yogi squat into your daily life, you will be able to find what works for you and improve the pose. Start slow, try to get low, and make the yogi squat truly your own.
Image credit: Sanàa Jaman
